As a photographer, the thought of packaging and shipping your finished product may be the last thing on your mind. If you have prints for sale on a personal website or your business website, knowing how to professionally package your work to deliver to your clients is very important. Your packaged prints or framed photographs may be what prospective customers see in a gallery or what you send in the mail. No matter what, you want to be sure to use packaging materials to keep your photos safe and looking professional.
Everything that you do with your business is a reflection of your brand... that includes your investment of time and the care that you put into packaging. From the materials you use to wrap and protect your prints to the container used for delivery or shipping, you are building a relationship with your customers. An ideal packing list includes rigid backing to support your prints and, if possible, high-quality archival material for long-lasting protection.
There are so many different ways you can package and ship your prints, so what you choose to do for your business is really just a matter of preference. Today, ClearBags is going to tell you about a few packaging solutions to help you create an awesome finished product that fits your brand as well as some ideas for shipping.
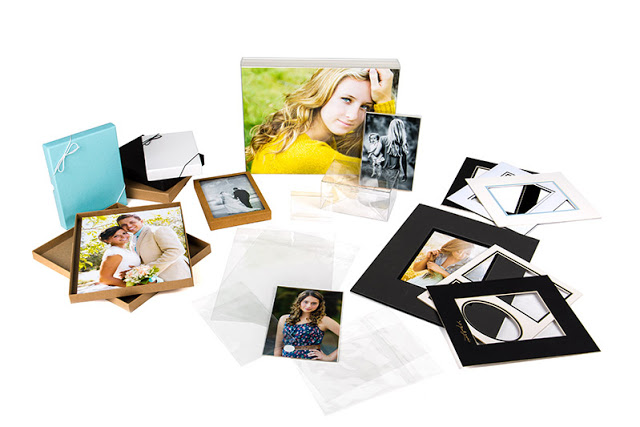
Photo credit: ClearBags
Packaging For Photography
How can you package your photography so that it looks professional and inviting to your customers? A simple method is to place your prints into a clear plastic bag along with a piece of rigid backing to keep it from bending. You can also hinge your prints to matting to enhance your presentation. Your final package can also include additional touches that reflect your personal style.
What makes one package stand out from another is the quality of materials used. Here are some ideas of art packaging supplies that you can use.
1. High Clarity Archival Bags
The higher the clarity of your plastic bags, the better your presentation. Clear archival plastic bags made of Biaxially Oriented Polypropylene, or BOPP for short, have set the industry standard for clarity and they are archival safe. Archival BOPP bags show off your prints in high definition while keeping your product well-protected. While paper folios and paper cases are some other options, BOPP bags are less expensive and allow your art to shine through.
When selecting a BOPP archival bag, here are three options to consider:
Protective Closure Bags - made with the resealable adhesive on the body of the bag instead of the flap. With this design, the adhesive does not stick to your prints when pulling them out of the bag.
Flap Seal Bags - flap seal bags have the adhesive on the bag flap. These bags allow you customize the height by folding the flap past the opening of the bag, allowing more flexibility. The downside is that the adhesive may catch on your print when removing it from the bag.
No Flap Bags - As the name suggests, these bags have no flap. They also do not have any adhesive; they are sealed on three sides and open on the top. Many people like no flap bags because they are easy to use. The downside is that they are simply not as secure because there is no way to seal the bag closed.
When considering all three of these options, protective closure bags are considered the most ideal for packaging photography. The location of the adhesive on the bag makes it easy to remove and insert prints without doing any damage or harm making it a popular choice.
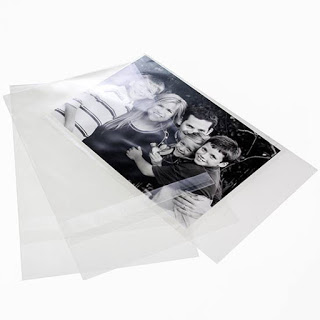
Photo credit: ClearBags
2. Get The Right Fit
When you are packaging your work, you also want to make sure the bag fits appropriately. Loose bags may look tacky and thrown together where a properly fitted bag looks more professional. Plastic bags vary in size and in depth to accommodate all types of products including ones that have a backing or photos that come matted or framed. When selecting a bag size, check the amount of depth needed with any additional backing or matting that the specific product includes. Some people like to buy a bigger bag altogether to fit more than one print inside. This could be a good option for customers who order multiple prints.
3. Bags For Canvas and Framed Photos
Canvas and framed photography pieces will require thicker and more durable packaging to be sure that it stays protected and our Canvas Gallery Wrap bags are the perfect solution! These bags are sized to accommodate the depth of a canvas or frame, are laminated for extra strength, and are designed with an oversized flap. Like protective closure bags, the adhesive is on the body of the bag so it won't come in contact with your art. The laminated material still retains high clarity for a professional presentation and keeps out moisture and harmful elements. The longer flap is helpful as it allows you to adjust the fit as needed. You can use these bags to package a single framed piece or hold a group of smaller prints together.
4. Backing Board
Even though it is not as showy as one of the clear bags, a rigid piece of backing is just as important to protect your prints. But, not all backing boards are created equally... here are the options to consider:
- Cardstock
- Foam core
- Corrugate
- Chipboard
To determine which of these options makes the most sense for your work, consider the level of protection needed and the thickness of the print. Foam core is available in 4-ply and 2-ply thicknesses and can be completely archival or just have only archival surfaces. This type of backing is quite rigid and sturdy for mailing prints and can later be used by your customers for framing. You may prefer a solid white or black foam core board to the appearance of cardboard. On the other hand, a heavy-duty corrugated pad or chipboard may be exactly what your piece requires. Do include this essential piece to your package to keep your prints from bending or creasing.
Photo credit: Stephanie Corfee Artworks
5. Matting
A beautiful mat will really allow your print to stand out and could increase your sales potential. For a gallery presentation, the presence of a mat may be the determining factor in making a purchase. For a mailed package, customers may attach a higher value to a matted piece and result in a future purchase.
Mat boards can be simply decorative or archival-grade and last for decades. Here are some available options:
Slip-in mats - Slip-in mats are great if you want something quick, easy, and efficient. With slip-in mats, the mat is already affixed to the backing. Simply slide your print into the opening at the top of the mat and you're all set - no tape or adhesive is needed to secure your print. As slip-in mats are relatively new, these are usually available in small sizes in black and white and cost a bit more than other mats.
Pre-cut mats - If you need more choices, you can find a wide selection of conservation-grade and decorative (non-archival) pre-cut mats in popular and larger sizes. If you don't need archival packaging, decorative pre-cut mats are a cost-effective way to add a splash of color to your presentation.
Custom mats - You may have a customer who has something in mind or an original piece that requires specific sizing. This route allows you the flexibility to dream up whatever color and size you desire to create your masterpiece. You can also create a unique experience by pre-printing your signature directly onto the mat. You might also try using mounting tape for a quick and convenient way to mount your prints to backing board.

Photo credit: ClearBags
6. Including That Personal Touch
Your final product packaged beautifully wouldn't be complete without your very own personal touches. This is where you can show off your own brand or business. You always want to include your business card so the customer has your contact information. You could also include a personal note or photo to the client thanking them for their order. A few other things you could include are: a packing slip with their printed order, Certificate of Authenticity, or a customized card (that could include a discount for a future purchase). Extending these personal extras invite your customers to get to know you better and shows your commitment to your business.
7. Shipping Time
Even though shipping is one of the final steps of the process, you want to be sure that you are shipping your prints safely so they get where they need to go without any damage whatsoever.
How you ship them just depends really on what you prefer. There are many options available to you, depending on the size of your work, how much money you want to spend, and how you want to present it. You can wrap your prints in tissue, brown paper, cardboard, or silk. A more expensive piece may warrant a fancy, boutique box for a more satisfying experience for your customer.
Unboxing a piece of photography is an experience in and of itself and is your customer's first impression. What you are shipping will, of course, influence this decision. No matter what type of container you choose, remember to support your art with some kind of rigid backing. Consider these various options:
- Rigid mailers - For lightweight to medium-weight art prints, rigid mailers are perfect. They provide sturdy support and reinforcement for items that need to stay flat such as art prints. You can also find heavy-duty mailers that are thicker and designed to take on more weight.
- Airsafe™ Art boxes - Airsafe™ art boxes are specially designed to package art. They provide two inches of air space between your product and the outer wall to protect your art and are made of corrugated cardboard. Check out this demonstration of how to assemble these boxes and see how they work.
- Boutique boxes
- Rigid metal boxes
- Chipboard boxes
- Tubes - Another method of shipping prints is to roll them up and put them in tubes. This works well for lightweight pieces and for shipping more than one print.
You will have to factor in the size of the package you are shipping when deciding what option to use. And remember to always support your photography and artwork with some kind of rigid backing, no matter which of these packages you are shipping them in.

Photo credit: ClearBags
8. Finishing Touches
It always looks professional to use printed labels on your packages rather than writing them in on your own. And you may want to think about adding a "Do Not Bend" or "Fragile" sticker on each photography package you ship. Each of these make your packaging look so professional, which in turn showcases your brand in a great way!
This post was written by ClearBags, the premier packaging company that specializes in Crystal Clear Packaging. ClearBags offers thousand's of packaging products. With over 4,000 styles and sizes in stock, they have what you need for your business. Visit www.clearbags.com to see more!
Have You Signed Up For Our Newsletter?
If not, be sure to enter your info below to to stay up to date on our other giveaways and industry deals and news!