Unlimited Templates and Overlays for Photographers

If you are a photographer then you will love what Mockaroon has to offer! Mockaroon offers a simple, fantastic monthly membership available to photographers and other creatives: unlimited access to their entire library of Photoshop Templates, Overlays, Marketing Templates and more. With a continually growing library, this means your membership gains value every day!

Click here to Join Now

You do not have to be a full time professional photographer to get value from a Mockaroon membership. The digital resources here will benefit full time professional photographers, semi-professional photographers, as well as amateur and hobbyist level photographers.

There is a solid mix of both templates and overlays to enhance your creative output, as well as marketing tools that will help provide a more professional experience for your prospective clients. These tools will professionalize your brand look and feel and help with the conversion of prospect to new client!

Click here to Join Now

Why we love Mockaroon:

  • Unlimited access to high quality designs: Let Mockaroon’s design team do the work of creating professional digital assets for you to use. Updated based on customer feedback and design trends.

  • Keep your assets in one place: Save admin time and headaches. All digital assets are stored in Mockaroon’s cloud platform – download for use and never lose them again!

  • Easy to use: No design skills necessary, just download and easy edit to get that professional look.

  • No contracts! Cancel any time: Hassle-free cancellations are always welcome. But then again, why would you want to cancel?

Click here to Join Now

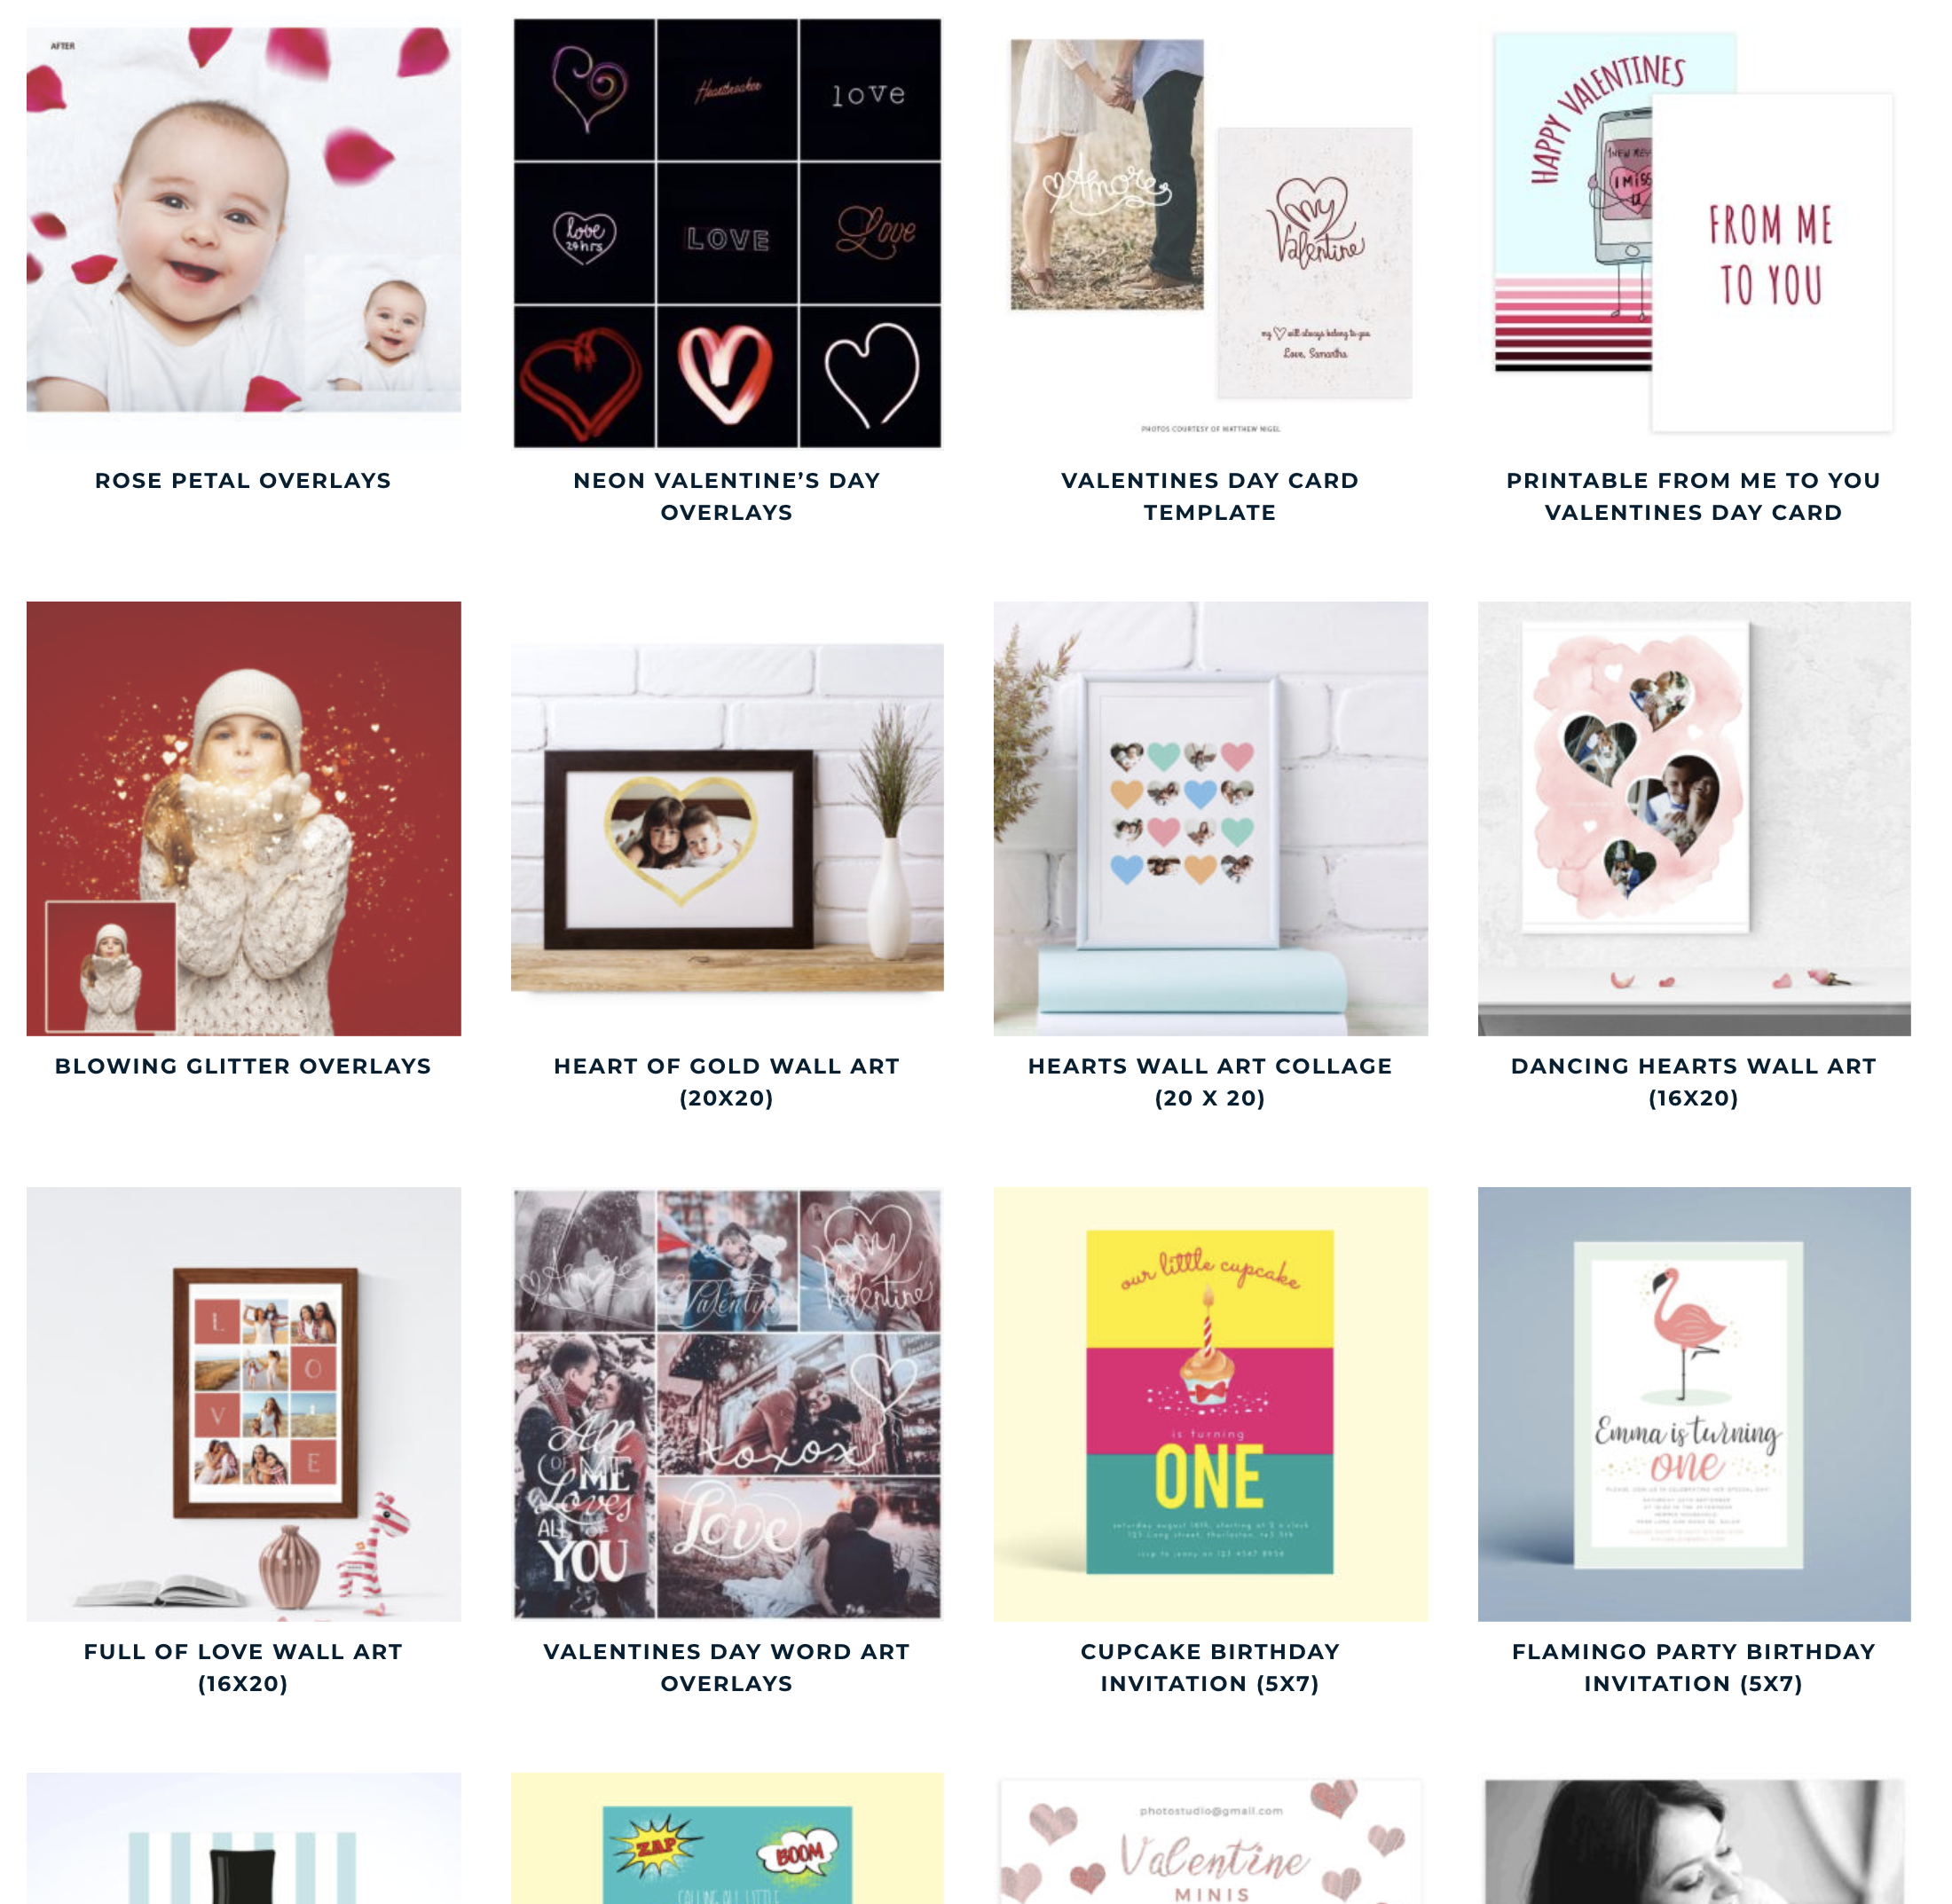
What can you get on Mockaroon? Almost any type of creative, customizable digital asset you need:

Take a look at the current What’s New category, featuring several timely Valentine’s Day additions – click here to see What’s New.

You can even try Mockaroon for free! That’s right – test out some free templates and see if Mockaroon is the right fit for you. You can download, customize and even print out these templates totally free. No catch, no commitments!

Click here to get your free templates.

Is Peace of Mind For Your Business Worth $21 a Month?

As a photography business owner, do you have good insurance that can protect you and your work? You want to have a plan that is simple, affordable and tailored to meet your business needs and Next Insurance does just that!

Next Insurance offers Professional Photographer Insurance with prices ranging from $21 - $42 a month! Each plan will give you piece of mind and help you focus on what you do best... taking amazing photos!

With a Next Insurance plan, you can show your client easily that you carry professional photographer insurance by quickly downloading their Certificate of Insurance that is online. They also offer a payment plan so you can keep your business running and insured at the same time - the payment plan does not cost you any extra! You can even cancel instantly online anytime! How simple is that?!?

See more about their Pro and Pro Plus plans here. 

All plans from Next Insurance include General Liability coverage; Pro Plus also includes equipment coverage. Here is a bit more about what is included: 

Equipment protection (Pro Plus Plan only)

This would be handy if you drop your lens while shooting on location and it cracks. Next Insurance will cover the replacement value, or the current cost to replace the lens. 

Injury to your client

If you are at a photo shoot with clients and your light stand falls and injures someone.... If that person sues, Next Insurance would cover it! 

Property damage

You may be having a photo shoot at a clients home and accidentally spill coffee on the clients expensive rug. If they end up suing you for damage, Next Insurance has you covered!

Medical payments

If someone gets injured while you are shooting, instead of suing you they want you to pay their medical bills. No problem... Next Insurance will cover it! 

Photo Of The Week

Our photo of the week was taken by Sandy Scott with Sandy Scott Photography. It is a great horned owl in flight shot in St. Petersburg, Florida, in February 2018.  Sandy's photo was also just picked as a favorite by National Geographic Editor David Y. Lee!

Sandy Scott.jpg

You can see more of Sandy's work and read about him on sandyscott.growingbolder.comwww.brokennecktobrokenrecords.com and society6.com/sandyscott. You can also follow him on Facebook and on Viewbug

We Want To Feature Your Work!

Do you have some really amazing photos you have taken recently or some of your past work that you simply love? We want to see! Each Tuesday, we will be featuring a "photo of the week" right here on the Camera Giveaways blog. We are looking for anything from amazing landscape photos, a gorgeous wedding or engagement shot, sports or animal photography, an awesome fashion photo...whatever you want to share, we would love to see!

Email your photos to contact@cameragiveaways.com with the subject "CG Blog Photo Submission" for consideration. In your email be sure to include a description of your photo, your name and company name as well as website and social media links. Please... no watermarks! If this information is not included, your photo will not be included.

Photo Of The Week

Our photo of the week was taken by Jenny Reynolds which she has titled "Dark Sky."

jenny reynolds1.jpg

You can see more of Jenny's work on Twitter @jennyreynolds3

We Want To Feature Your Work!

Do you have some really amazing photos you have taken recently or some of your past work that you simply love? We want to see! Each Tuesday, we will be featuring a "photo of the week" right here on the Camera Giveaways blog. We are looking for anything from amazing landscape photos, a gorgeous wedding or engagement shot, sports or animal photography, an awesome fashion photo...whatever you want to share, we would love to see!

Email your photos to contact@cameragiveaways.com with the subject "CG Blog Photo Submission" for consideration. In your email be sure to include a description of your photo, your name and company name as well as website and social media links. Please... no watermarks! If this information is not included, your photo will not be included.

Tips On Packaging Photography For Shipping From ClearBags

As a photographer, the thought of packaging and shipping your finished product may be the last thing on your mind. If you have prints for sale on a personal website or your business website, knowing how to professionally package your work to deliver to your clients is very important. Your packaged prints or framed photographs may be what prospective customers see in a gallery or what you send in the mail. No matter what, you want to be sure to use packaging materials to keep your photos safe and looking professional.

Everything that you do with your business is a reflection of your brand... that includes your investment of time and the care that you put into packaging. From the materials you use to wrap and protect your prints to the container used for delivery or shipping, you are building a relationship with your customers. An ideal packing list includes rigid backing to support your prints and, if possible, high-quality archival material for long-lasting protection. 

There are so many different ways you can package and ship your prints, so what you choose to do for your business is really just a matter of preference. Today, ClearBags is going to tell you about a few packaging solutions to help you create an awesome finished product that fits your brand as well as some ideas for shipping.  

Photo credit: ClearBags

Photo credit: ClearBags

Packaging For Photography

How can you package your photography so that it looks professional and inviting to your customers? A simple method is to place your prints into a clear plastic bag along with a piece of rigid backing to keep it from bending. You can also hinge your prints to matting to enhance your presentation. Your final package can also include additional touches that reflect your personal style.

What makes one package stand out from another is the quality of materials used. Here are some ideas of art packaging supplies that you can use.

1. High Clarity Archival Bags

The higher the clarity of your plastic bags, the better your presentation. Clear archival plastic bags made of Biaxially Oriented Polypropylene, or BOPP for short, have set the industry standard for clarity and they are archival safe. Archival BOPP bags show off your prints in high definition while keeping your product well-protected. While paper folios and paper cases are some other options, BOPP bags are less expensive and allow your art to shine through. 

When selecting a BOPP archival bag, here are three options to consider:

Protective Closure Bags - made with the resealable adhesive on the body of the bag instead of the flap. With this design, the adhesive does not stick to your prints when pulling them out of the bag. 

Flap Seal Bags - flap seal bags have the adhesive on the bag flap. These bags allow you customize the height by folding the flap past the opening of the bag, allowing more flexibility. The downside is that the adhesive may catch on your print when removing it from the bag.

No Flap Bags - As the name suggests, these bags have no flap. They also do not have any adhesive; they are sealed on three sides and open on the top. Many people like no flap bags because they are easy to use. The downside is that they are simply not as secure because there is no way to seal the bag closed. 

When considering all three of these options, protective closure bags are considered the most ideal for packaging photography. The location of the adhesive on the bag makes it easy to remove and insert prints without doing any damage or harm making it a popular choice. 

Photo credit: ClearBags

Photo credit: ClearBags

2. Get The Right Fit

When you are packaging your work, you also want to make sure the bag fits appropriately. Loose bags may look tacky and thrown together where a properly fitted bag looks more professional. Plastic bags vary in size and in depth to accommodate all types of products including ones that have a backing or photos that come matted or framed. When selecting a bag size, check the amount of depth needed with any additional backing or matting that the specific product includes. Some people like to buy a bigger bag altogether to fit more than one print inside. This could be a good option for customers who order multiple prints. 

3. Bags For Canvas and Framed Photos

Canvas and framed photography pieces will require thicker and more durable packaging to be sure that it stays protected and our Canvas Gallery Wrap bags are the perfect solution! These bags are sized to accommodate the depth of a canvas or frame, are laminated for extra strength, and are designed with an oversized flap. Like protective closure bags, the adhesive is on the body of the bag so it won't come in contact with your art. The laminated material still retains high clarity for a professional presentation and keeps out moisture and harmful elements. The longer flap is helpful as it allows you to adjust the fit as needed. You can use these bags to package a single framed piece or hold a group of smaller prints together. 

4. Backing Board

Even though it is not as showy as one of the clear bags, a rigid piece of backing is just as important to protect your prints. But, not all backing boards are created equally... here are the options to consider:

To determine which of these options makes the most sense for your work, consider the level of protection needed and the thickness of the print. Foam core is available in 4-ply and 2-ply thicknesses and can be completely archival or just have only archival surfaces. This type of backing is quite rigid and sturdy for mailing prints and can later be used by your customers for framing. You may prefer a solid white or black foam core board to the appearance of cardboard. On the other hand, a heavy-duty corrugated pad or chipboard may be exactly what your piece requires. Do include this essential piece to your package to keep your prints from bending or creasing. 

Photo credit: Stephanie Corfee Artworks

Photo credit: Stephanie Corfee Artworks

5. Matting

A beautiful mat will really allow your print to stand out and could increase your sales potential. For a gallery presentation, the presence of a mat may be the determining factor in making a purchase. For a mailed package, customers may attach a higher value to a matted piece and result in a future purchase. 

Mat boards can be simply decorative or archival-grade and last for decades. Here are some available options:

Slip-in mats - Slip-in mats are great if you want something quick, easy, and efficient. With slip-in mats, the mat is already affixed to the backing. Simply slide your print into the opening at the top of the mat and you're all set - no tape or adhesive is needed to secure your print. As slip-in mats are relatively new, these are usually available in small sizes in black and white and cost a bit more than other mats. 

Pre-cut mats - If you need more choices, you can find a wide selection of conservation-grade and decorative (non-archival) pre-cut mats in popular and larger sizes. If you don't need archival packaging, decorative pre-cut mats are a cost-effective way to add a splash of color to your presentation.

Custom mats - You may have a customer who has something in mind or an original piece that requires specific sizing. This route allows you the flexibility to dream up whatever color and size you desire to create your masterpiece. You can also create a unique experience by pre-printing your signature directly onto the mat. You might also try using mounting tape for a quick and convenient way to mount your prints to backing board. 

Photo credit: ClearBags

Photo credit: ClearBags

6. Including That Personal Touch

Your final product packaged beautifully wouldn't be complete without your very own personal touches. This is where you can show off your own brand or business. You always want to include your business card so the customer has your contact information. You could also include a personal note or photo to the client thanking them for their order. A few other things you could include are: a packing slip with their printed order, Certificate of Authenticity, or a customized card (that could include a discount for a future purchase). Extending these personal extras invite your customers to get to know you better and shows your commitment to your business. 

7. Shipping Time

Even though shipping is one of the final steps of the process, you want to be sure that you are shipping your prints safely so they get where they need to go without any damage whatsoever. 

How you ship them just depends really on what you prefer. There are many options available to you, depending on the size of your work, how much money you want to spend, and how you want to present it. You can wrap your prints in tissue, brown paper, cardboard, or silk. A more expensive piece may warrant a fancy, boutique box for a more satisfying experience for your customer. 

Unboxing a piece of photography is an experience in and of itself and is your customer's first impression. What you are shipping will, of course, influence this decision. No matter what type of container you choose, remember to support your art with some kind of rigid backing. Consider these various options:

  • Rigid mailers - For lightweight to medium-weight art prints, rigid mailers are perfect. They provide sturdy support and reinforcement for items that need to stay flat such as art prints. You can also find heavy-duty mailers that are thicker and designed to take on more weight.
  • Airsafe™ Art boxes - Airsafe™ art boxes are specially designed to package art. They provide two inches of air space between your product and the outer wall to protect your art and are made of corrugated cardboard. Check out this demonstration of how to assemble these boxes and see how they work. 
  • Boutique boxes
  • Rigid metal boxes
  • Chipboard boxes
  • Tubes - Another method of shipping prints is to roll them up and put them in tubes. This works well for lightweight pieces and for shipping more than one print.

You will have to factor in the size of the package you are shipping when deciding what option to use. And remember to always support your photography and artwork with some kind of rigid backing, no matter which of these packages you are shipping them in.  

Photo credit: ClearBags

Photo credit: ClearBags

8. Finishing Touches

It always looks professional to use printed labels on your packages rather than writing them in on your own. And you may want to think about adding a "Do Not Bend" or "Fragile" sticker on each photography package you ship. Each of these make your packaging look so professional, which in turn showcases your brand in a great way!


This post was written by ClearBags, the premier packaging company that specializes in Crystal Clear Packaging. ClearBags offers thousand's of packaging products. With over 4,000 styles and sizes in stock, they have what you need for your business. Visit www.clearbags.com to see more!


Have You Signed Up For Our Newsletter?

If not, be sure to enter your info below to to stay up to date on our other giveaways and industry deals and news!


Find Your Photography Niche: You Don’t Have to Master It All

If you have a passion for photography, you should find out what your niche is and specialize in it. Do you want to be a professional photographer? Figuring out how to get to that level without any formal photography education can be tricky. Here are some tips from PhotoModeler that will come in handy when you are trying to find your niche:

Screenshot 2018-04-12 12.46.13.png

Understand the Different Niches

To find the niche that you should specialize in, you first need to know them all. They include:

Event photography – because the industry of event photography is big, it can pay good money. However, if you do not like traveling from one place to another, this niche is not for you.

Food photography – if you want to make some serious cash, you should venture into this industry because it pays very well. Just keep in mind that the equipment and setup can be a bit expensive.

Fashion photography – you will work with many high-profile people and your photos might be published in recognizable magazines. However, the sheer number of fashion photographers in the market might make it harder to penetrate.

Sports photography – as a sports photographer, you will have access to huge sporting events. To make it in sports photography, you have to be a big sports fan to ensure that your photos communicate the right message.

Fine art photography – you can start this career whilst working on your art, which makes the niche hard to penetrate. It is better suited for photographers who have been in the business for a while.

Stock photography – you can be a self-employed stock photographer, but you would have to take numerous photographs to make a decent income.

Portrait photography – this is a big market that will expose you to different types of people. However, it will take longer to establish your name as a brand.

Wedding photography – many photographers join the wedding industry because wedding photos are in demand and they can make good money. Before deciding to become a wedding photographer, you should know that it is a demanding job and you might need an assistant.

Try Everything Then Focus on What You Love

Screenshot 2018-04-12 12.51.18.png

If you are in the early stages of your photography journey, you should explore as many different niches as possible. You might find that you really like weddings, fashion, or portraiture. Many aspiring photographers let their fear stop them from trying different niches.

You should not expect to be good at everything that you try; just make sure that if you excel in one niche, you stick with it. When you explore different niches, you will learn a lot from photographers in different fields – this knowledge might come in handy later.

Never Stop Learning

If you pick a certain skill set, you need to immerse yourself in it during your free time. You do not even have to attend a college to learn the skill; you can just read books and articles written by photography experts and keep practicing what you read. If you invest your time in education, you will end up learning a lot.

Determine Your Inspiration

Without any inspiration, you will not find your niche quickly. You should ask yourself what inspires you if you want to develop a passion and love for a niche. If you choose a niche randomly, the art of taking photos will feel contrived and forced instead of coming naturally.

Moreover, you might end up disliking the random choice you made. If you think that you are a great fit for family photography but your first gig does not live up to your expectations, you should take some time to rethink your inspiration. If you have a penchant for lifestyle photos, you should shoot family photos in lifestyle mode.

Buy the Right Tools                           

The right equipment makes it easier for you to get a great shot. When you first start out, you will not know what the best tools for the job are. With time, as you learn what the best tools are and start using them, you will be able to choose the best photography software such as PhotoModeler and Photoshop. To understand how the software works, read articles such as PhotoModeler – How it Works.

This post was written by Ashley Lipman with PhotoModeler, a software development company headquartered in Vancouver, Canada that develops and markets 3D modeling technology designed to bring the power of photogrammetry to a wide audience for practical application.


If you want to start your own photography business, you need to get this guide from BP4U Photography Resources - How To Start Your Photography Business. You will learn about marketing, building a website, finding clients, getting a logo, balancing your photography and your life and family, offering discounts, and so much more! You can get this guide today for only $5.99 (a $124 value)!

GET HOW TO START YOUR PHOTOGRAPHY BUSINESS HERE!!!


Have You Signed Up For Our Newsletter?

If not, be sure to enter your info below to to stay up to date on our other giveaways and industry deals and news!


Photo Of The Week

Our photo of the week was taken by Audrey Cramer with Cramer Imaging which is titled "Union Pacific Railroad 844 Steam Engine."

Here is what Audrey said about her photo: "I shot this photo with a Nikon D7200 with a Tamron 70-300 mm lens. The steam engine is a relic of a bygone era.  The Union Pacific still runs a few of them and they are tourist attractions for the short time they stop in a town.  When they stopped in town for us, we made sure to get this photo."

Audrey Cramer.jpg

You can see more work from Audrey at her website www.cramerimaging.com. You can also follow her on Facebook or Instagram

We Want To Feature Your Work!

Do you have some really amazing photos you have taken recently or some of your past work that you simply love? We want to see! Each Tuesday, we will be featuring a "photo of the week" right here on the Camera Giveaways blog. We are looking for anything from amazing landscape photos, a gorgeous wedding or engagement shot, sports or animal photography, an awesome fashion photo...whatever you want to share, we would love to see!

Email your photos to contact@cameragiveaways.com with the subject "CG Blog Photo Submission" for consideration. In your email be sure to include a description of your photo, your name and company name as well as website and social media links. Please... no watermarks! If this information is not included, your photo will not be included.

How To Control Light With Grids

Artificial lighting can be a bit nerve-wracking when you first use it; there are a range of modifiers, setups, and techniques to learn that can be daunting. This great video from David Bergman at Adorama TV that we saw in this article in Fstoppers, is a great introduction to grids. It will introduce you to grids and explain how they're used in artificial lighting scenarios and the reasons behind using them as well. Enjoy!

As it mentions on FStoppers, the problem with a lot of modifiers, particularly bigger ones that cast a softer light, is that they tend to throw light everywhere, and it may spill places you'd rather not have it. The grid comes in handy because you can put over the front of the modifier, so a nice, soft light comes out in front but it is limited on the sides. This is especially handy when you're working with multiple lights and need to precisely control where each one falls. As Bergman mentions, this also frees you to light the background however you please. 

If you enjoyed this video, check out this one for a little photography inspiration!


Do you take many of your photos outdoors? Are you tired of wasting your day editing photos all day long? Then The Ultimate Season Action Bundle is for you! No matter what type of season, weather or lighting condition, these actions are perfect! You can get this entire bundle for only $9.99 (a $199.99 value)! 

GET THE ULTIMATE SEASON ACTION BUNDLE NOW!

Have You Signed Up For Our Newsletter?

If not, be sure to enter your info below to to stay up to date on our other giveaways and industry deals and news!


Photo Of The Week

Our photo of the week was taken by Trisha Phillips with Trisha Phillips Photography & Design

Here is what Trisha had to say about her photo: "Every spring, a new set of cows come to our pasture behind our house and it is always fun to see who they are going to be!  This is 56 and 56.2.  As babies they loved coming up to the fence and letting me take their picture but as they got older, they were less curious about me and my camera.  I am looking forward to getting new cows this spring and hope they are as photogenic as these two were!"

Trisha Phillips.jpg

To see more of Trisha's work, visit her on Facebook or on her website tphillipsdesign.wixsite.com/photography

We Want To Feature Your Work!

Do you have some really amazing photos you have taken recently or some of your past work that you simply love? We want to see! Each Tuesday, we will be featuring a "photo of the week" right here on the Camera Giveaways blog. We are looking for anything from amazing landscape photos, a gorgeous wedding or engagement shot, sports or animal photography, an awesome fashion photo...whatever you want to share, we would love to see!

Email your photos to contact@cameragiveaways.com with the subject "CG Blog Photo Submission" for consideration. In your email be sure to include a description of your photo, your name and company name as well as website and social media links. Please... no watermarks! If this information is not included, your photo will not be included.

You Don't Want To Miss This Awesome Online Photography Course Taught By Annie Leibovitz At MasterClass

This post contains affiliate links and Camera Giveaways will be compensated if you make a purchase after clicking on links.

Are you just starting out in photography? Or, perhaps you have been taking photos for years and are interested in continuing to learn even more? You have to check out this photography course called Annie Leibovitz Teaches Photography that is offered through MasterClass. 

Screenshot 2018-03-29 16.14.50.png

For only $90, this course contains 15 lessons and a downloadable workbook that you can complete at your leisure that are taught by Annie Leibovitz, an American portrait photographer. Annie has photographed John Lennon on the day he was assassinated, and her work has been used on numerous album covers and magazines. Who better to learn the art of photography from?

REGISTER FOR THE "ANNIE LEIBOVITZ
TEACHES PHOTOGRAPHY" COURSE NOW!

The following are the titles of each lessons you will take in the course:

  1. Introduction
  2. Portrait Photography
  3. Creating Concepts
  4. Working with Light
  5. Studio vs. Location
  6. Working With Your Subject
  7. Case Study: Angels in America Photoshoot For Vogue Magazine
  8. Photographing People Who Are Close To You
  9. Looking Back At Your Work
  10. The Technical Side Of Photography
  11. Student Sessions
  12. Case Study Part 1: Photographing Alice Waters
  13. Case Study Part 2: Digital Post-Production
  14. Photographic Influences
  15. The Evolution of a Photographer

You will also be able to download a workbook so you can follow along during each lesson. There is a Q&A portion where Annie answers student questions and provides feedback on assignments. You can also submit your own questions to be answered. And, you can learn both on desktop or mobile so it is easy to access on the go. 

Get All 15 Lessons From Annie Leibovitz
For Only $90 Now!


MasterClass offers so many different classes from some AMAZING instructors. Learn to cook from Gordon Ramsey, learn how to build a fashion brand from Diane Von Furstenberg, learn to sing with Christina Aguilera, learn to act with Samuel L. Jackson, learn about filmmaking with Werner Herzog or Spike Lee, learn about investigative journalism with Bob Woodward, learn how to write for television with Shonda Rhimes, learn tennis with Serena Williams, learn directing with Ron Howard, learn about writing with Judy Blume or James Patterson, and SO MUCH MORE! 

Love to learn about everything from industry experts? For only $180 a year, you can have access to every class offered on MasterClass! 

CHECK OUT ALL THE CLASSES OFFERED HERE!